This blog presents my DIY, homemade projects. The intention is to provide audience as much information as possible so that they do not face the problems I had.
Tuesday, August 26, 2014
DIY CNC Build - Full Story
Long time no see... Here is a video of me building the CNC. I will publish how I built the quadcopter in the next post. Enjoy...
Sunday, May 11, 2014
DIY CNC Build in Switzerland - First Real Job - Cut for the Mother's day present
Hi everyone... I was away for 10 days due to a business trip. Today I just designed a plate for my wife for Mother's day. Here is the real cut video. Sorry for the noise of spindle. Have fun...
See you next time for some details...
See you next time for some details...
Wednesday, April 30, 2014
DIY CNC Build in Switzerland - First Virtual Job
Here is a video for you:)
Waiting for your comments...
DIY CNC Build in Switzerland - Finished mechanical structure Details and Electronics - Part 2
Here I am finished the wiring for motors and spindle. I have not connected the limit switches yet but I could not wait to test it:) So i am using only soft limits in Mach3.


Wait for my next post:) Still uploading the video. It will be fun;) I promise...
Wait for my next post:) Still uploading the video. It will be fun;) I promise...
Tuesday, April 29, 2014
DIY CNC Build in Switzerland - Finished mechanical structure Details and Electronics - Part 1
Greetings! I have already posted a photo of the finished mechanical base for the CNC but I did not have time or energy to post the details. So in this post I will present some details and start building the electronics, cabling and the rest.
So lets start. I have mentioned that I did not like the look of the MDF in its raw color. So I painted the wooden pieces in blue.
 As you may guess, I needed to disassemble everything to do this:) I reassembled everything and it look really cool in blue:)


While mounting I struggled a lot to get the timing belt in correct alignment and tight:) This turned out to be a nightmare of my CNC project. If you need more support I can create a new post just for belt tension and mounting. Let me know.


 For the face plate that I will cut on top, I cut an aluminum plate and drilled some guide holes. As you may remember I told cutting thick aluminum is hard. I bought a new precision blade for my saw which is specially built for aluminum. It cuts aluminum like butter, but makes enormous amount of noise.


Now it is time for cabling the steppers. Time to solder things together.

 I used a project box to organize the cables to the side of gantry.
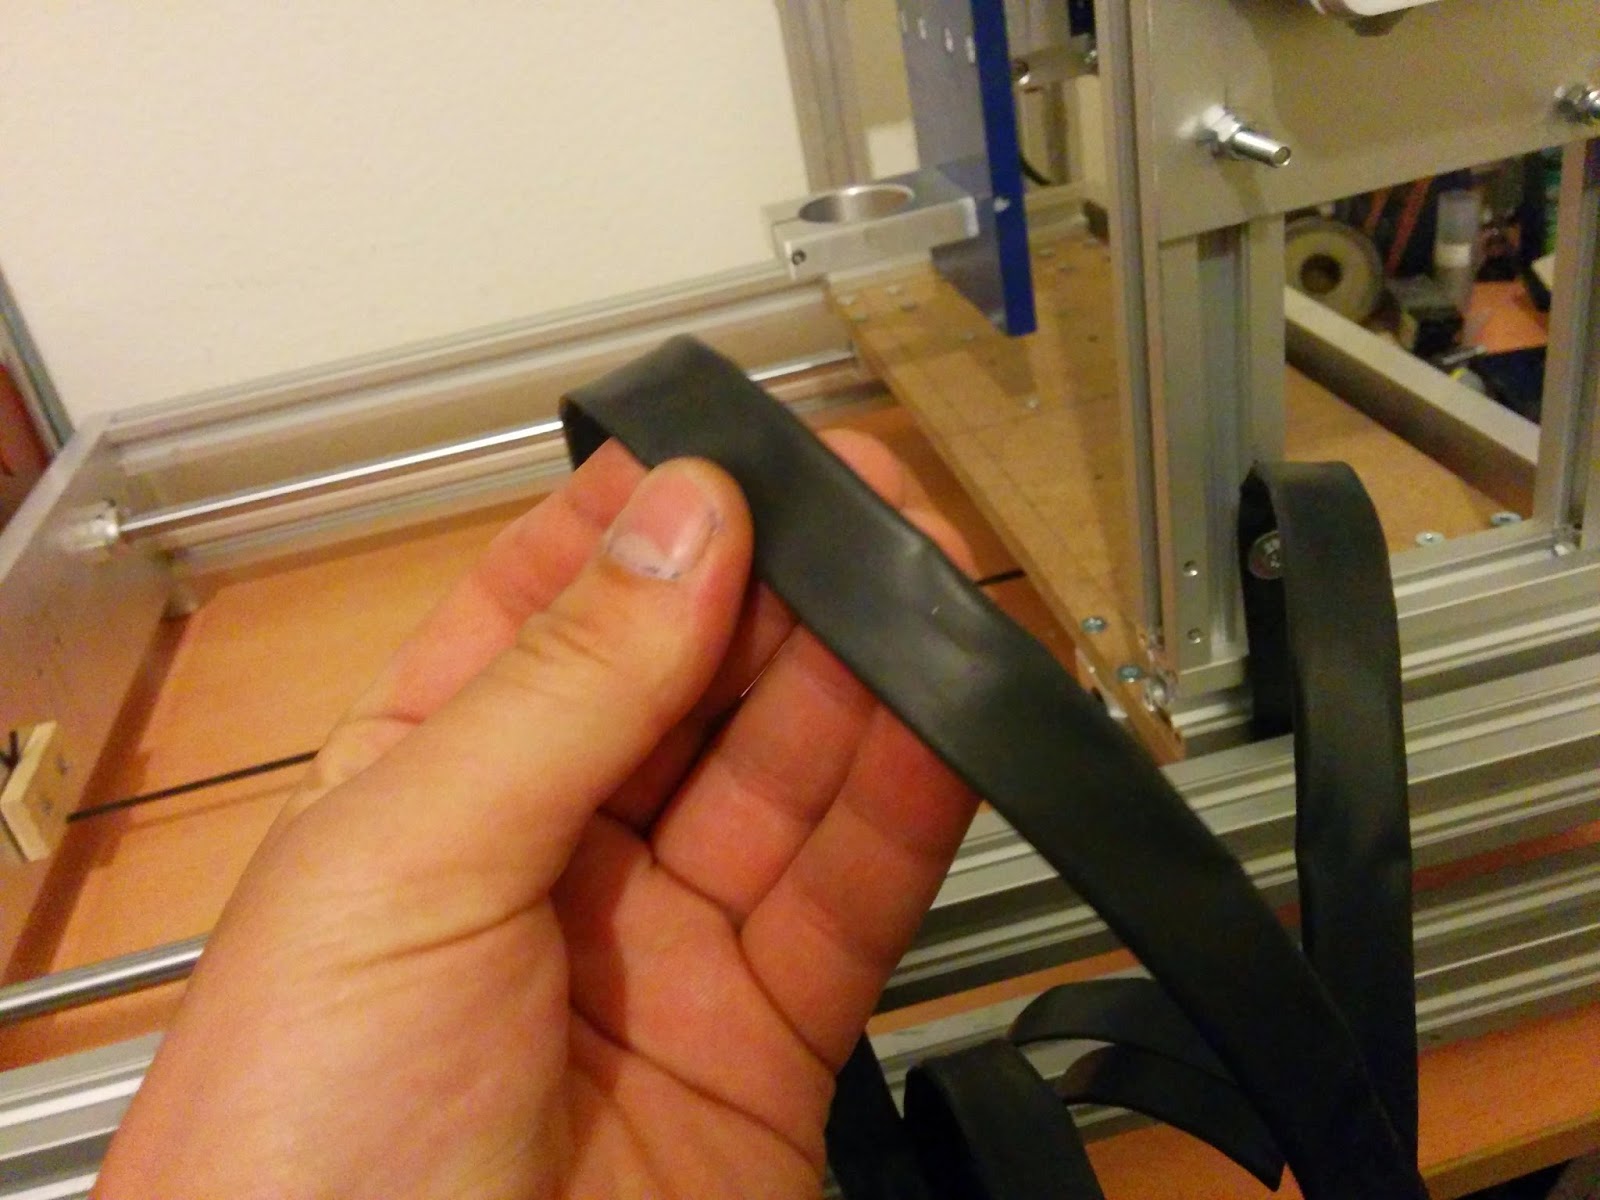
 In the meantime, I realized that the CNC makes a lot of vibrations and this causes a lot of noise. So I mounted rubber legs to the bottom of the CNC first.
 For the cables under the gantry, I used a staple gun to attach the cables under the gantry.

 Next is mounting the project box to the gantry side. I used a lot of shrink tubes to organize the cables.

 For moving the cables with the axis movement I used a 10mm cable carrier. I drilled a hole to the gantry and tapped the hole with M4 for mounting the cable carrier.


For the spindle, I did not like the standard cable at all. It was so thick and not bendable. So I replace the spindle cable with a better quality cable to use within cable carrier.


And the current state.

See you soon. Let me hear you comments...
So lets start. I have mentioned that I did not like the look of the MDF in its raw color. So I painted the wooden pieces in blue.
While mounting I struggled a lot to get the timing belt in correct alignment and tight:) This turned out to be a nightmare of my CNC project. If you need more support I can create a new post just for belt tension and mounting. Let me know.
Now it is time for cabling the steppers. Time to solder things together.
For the spindle, I did not like the standard cable at all. It was so thick and not bendable. So I replace the spindle cable with a better quality cable to use within cable carrier.
And the current state.
See you soon. Let me hear you comments...
Sunday, April 27, 2014
DIY CNC Build in Switzerland - Finished mechanical structure
Finally... I finished the mechanical structure of my CNC. It is late and I am so tired. I cannot publish all the details now but I will post them soon. For the moment, here is a pic of the finished CNC:)

Till next time...
Till next time...
Friday, April 25, 2014
DIY CNC Build in Switzerland - Building the X and Z axis carriage belt mounts and testing motor movements
I started building the belt drive for X and Z axis carriage. The belt drive mount for X and Y axis is very tricky. I needed to come up with a good design so it is easy to mount the belt on the axis and easy to tighten the belt.
Lets start with X Axis. First I needed to measure, the belt location when I mount the X carriage. In the picture below, you see two lines on the MDF. These are the exact belt locations when I mount the X axis to gantry. The Linear bearings just clear from the gantry with 2mm so I need to mount the belt within at most the height of linear bearing.


I decided to use MDF again, but for the simplicity one can use the L shaped aluminum profiles that you can buy anywhere. I marked the area that I needed to cut on the MDF. Then cut the piece...

 I used the L shaped joint support brackets for attaching the belt mount to carriage. I just did a test fit without any drilling or screwing.So it looked ok to me.


Now, time to drill the holes. I drilled the holes with drill press and just enlarged the side of screw head so the screw does not stick out of the board.


Now time to build even trickier part: Z axis belt mount. All the things should be as precise as possible. So I measured the distance between plates of X and Z axis and calculated the clearance distance. Then, I followed the same procedure, cut the MDF, cut the acrylic plate and drill the holes. BTW, you need to cut a groove on top of the MDF as shown the images below so the belt can be fed by this groove.


In order not to have the belt slipping, I made some shallow cuts on the acrylic plate to hold the belt teeth strongly.

 And the most tricky part:) Attaching... First attach the belt to the bracket than place the Y axis on Y axis. I inserted only one of the steel rods so I have at least access to the screws from one side.


 Here is a video of the axis movement test. You can also visit my youtube channel
Ozgur Gulderen on Youtube
If you subscribe you will receive my videos:)
PS: I have good news:) I have disassembled the CNC for painting wooden parts. So the next time I will shoot a looooong video in which I will explain every single piece and assemble it again.
Lets start with X Axis. First I needed to measure, the belt location when I mount the X carriage. In the picture below, you see two lines on the MDF. These are the exact belt locations when I mount the X axis to gantry. The Linear bearings just clear from the gantry with 2mm so I need to mount the belt within at most the height of linear bearing.
Now, time to drill the holes. I drilled the holes with drill press and just enlarged the side of screw head so the screw does not stick out of the board.
I used acrylic plate for the mount plate. You can use wood but I wanted to see what is happening to belt:) So I needed something transparent. I cut the exact same size with MDF piece and drilled the holes as well. The final belt mount piece is shown below from different angles.
The idea of building such a thing is to mount this bracket to gantry first tighten the belt then screw it to X axis. If you have something that cannot be detachable from the X axis plate, then you will have a lot of difficulty to tighten the belt. And if the belt is not tight, then the pulley will skip threat in load condition.
Now time to build even trickier part: Z axis belt mount. All the things should be as precise as possible. So I measured the distance between plates of X and Z axis and calculated the clearance distance. Then, I followed the same procedure, cut the MDF, cut the acrylic plate and drill the holes. BTW, you need to cut a groove on top of the MDF as shown the images below so the belt can be fed by this groove.
In order not to have the belt slipping, I made some shallow cuts on the acrylic plate to hold the belt teeth strongly.
Ozgur Gulderen on Youtube
If you subscribe you will receive my videos:)
PS: I have good news:) I have disassembled the CNC for painting wooden parts. So the next time I will shoot a looooong video in which I will explain every single piece and assemble it again.
Subscribe to:
Posts (Atom)